I took my first test drive a few weeks ago only to realize there was no way to hear or tune the engine because the power steering was screaming like a school girl. So with less than a mile under our belt it was back to the driveway to remove both the power steering pump and box. Let me just say removal was a pain mostly due to the size and weight of trying to maneuver around everything and get it out to the ground. It was one thing to unbolt it, it was another to get it out on the ground.
I wish I would have taken photos of my power steering units as I took them off. They were big time greasy and nasty before I had them rebuilt from Weller Truck Parts in Grand Rapids Michigan this week. I called to inquire if they could rebuild my old parts and Nick the counter guy stated, I don't know, bring them on over. Once at Weller, Nick took a quick look and said no problem. I'm not going to say it was cheap but they turned them around in 24 hours all cleaned up with a new coat of paint.
Looks like I'll be busy this weekend
Header
Adventures And Restoration Of Our 1973 Travco 220 Motorhome
Friday, August 14, 2015
Wednesday, October 1, 2014
Exterior Quick Update
We are starting to make progress and the Travco is definitely starting to look presentable but I am courious how the finish is going to hold up.
My options as yours when working to bring back the finish of an old gel-coat are:
1. Sand, Polish and Wax ( Been there done that )
2. Paint
3. Sealing with High Gloss Zep Floor Sealer. (I recently learned about this from the Myrtle Blog)
I tried the sanding and polishing version and it works pretty well, yet water still gets into the crazing and grows mold quickly, which is the black streaks that seem to form overnight, meaning about time I work all the way around, I start over and do it again. I know this because I have been going around and around this thing for three years. (again, don't remind my wife)
So... This fall I am attempting a combo of verison 2 and 3 from above. I'm painting the areas that are missing gel-coat or the gel-coat is to thin and sealing the whole unit with Zep floor sealer. I tried a couple tests and I think it might work.
In my current test, I have tried both wiping it on and spraying it on. I'll keep you posted.
Next Stop Lunch
Monday, September 8, 2014
It's in the Details
Where does time fly? Summer is over, another season of working on the Travco is nearing an end and I'm still not on the road. Thinking with a much clearer mind today than when I purchased this rv a few years ago, it seems that taking on a project of this magnitude might not have been the best idea. (Don't share this with my wife. I hate it when she's always right) I will admit that it was not my intention to get into a big project at this point in my life with having five kids ranging from college to a one year old and being self employed, but my goal was actually the complete opposite. My goal was to go enjoy the Travco and have some good cheap fun with the family. It's the sacrifice any good dad would make for his family, right? Is it my fault I looked under the carpet?
Well, where are we on this project? Not as far as I would like to be but we keep making progress.
Currently list:
1. Basic mechanicals have been addressed, see previous blog posts
2. Basic 12 volt electric's have been addressed and are ongoing. I would think a new fuse box would be in order.
3. Purchased fabric and in process of resewing seat covers
4. Needs flooring and kitchen cabinet refinishing completed
5. Welded new passenger floor structure and subfloor
6. Replaced entry steps and supporting structure
Current Project - Finish Exterior
I have sanded and sanded and sanded and sanded and
polished and polished and polished..... you get the picture.
No amount of sanding or polishing is going to remove the stress cracking in the gelcoat yet I think the end result is going to be very acceptable. Once completed, I'll post final pics. This past weekend, I painted the door and a bunch of small detail parts. It's this last detail phase of the project that gets fun. Up until now, it felt like 99% work with no show and once you get to the final assembly steps the whole project jumps to life.
Winter is coming and I need this thing closed up.
Next Stop Lunch.
Saturday, July 12, 2014
Day One: Chicago
The first leg of our road trip was pretty well planned. We, my son Elijah and I, would sneak out of church right after the worship (I lead the worship at our church) and hit the road with the goal of being in Chicago for lunch. Speaking of lunch, knowing that I only have one afternoon to introduce my son to Chicago and its amazing food, where should I take him? The choices are endless. I could take him downtown and we could eat at any number of the famous/tourist restaurants or we could hit the suburbs where small restaurants are on nearly every corner and it seems you can't go wrong with any of them. This method is my style but we will get back to this.
In preparation for the trip, I prepared the Vanagon with fresh Mobil 1 synthetic oil knowing that we were going to add a significant amount of stress on it over the next few days. Our Vanagon is a 1987 water-cooled flat four with a manual four speed transmission, meaning that our top cruising speed was between 55 and 57mph and the engine is running about 3200 rpms. Thats spinning super fast for any car, but speed was not an issue on this first day due to the fact that our chosen day to head to Chicago also happened to be the Sunday after the 4th of July. Apparently all of Chicago left the city for the Fourth and we got caught in their migration back to the city.
Over four hours later we arrived in the Windy City sadly already eaten McDonalds in the traffic jam, none-the-less we were in Chicago. We streched out our legs on the Magnificent Mile grabbed an iced coffee from Starbucks and headed to the suburbs for one of my favorite eats, El Llano's Colombian Restaurant. El Llanos serves simple meat and potato empanadas with lime wedges and green salsa for only a buck a piece, Seriously good stuff! Yes, I know what you are thinking but food truly brings me joy and did you happen to notice the name of this blog?
After dinner, and missing the opportunity to taste two restaurants in the city, we were back on the highway speeding along at our 57mph heading to our only planned campground, Kohler Andrae State Park located in Sheboygan, Wisconsin. I'm not much of a camper so it was not surprising that it started raining just as we entered the guard shack to reserve our space for the night. Who's idea was this?
Day one complete. Adventure to come.
Thinking of making the trip?
• Kohler Andrae State Park located in Sheboygan, Wisconsin on Lake Michigan - Super nice with Modern bathrooms and clean hot showers. Sites are first come first served unless you spring an extra 20 bucks to reserve a spot in advance.
• El Llano's Colombian Restaurant
4011 N Elston Ave
Chicago, IL 60618
- A little hole in the wall with a variety of Colombian dishes. It's not fancy but well worth the stop and you can usually find a parking spot right in front of the door.
Monday, July 7, 2014
An Adventure of Another Kind
Yes, we are still alive and still keep trudging along on the Travco but this is a post about another adventure. Along with my Travco, anyone who knows me knows that I have a love for all things odd that have wheels and a combustion engine. Currently my son and I are on a road trip around Lake Michigan in a 1987 Volkswagen Vanagon for his Birthday present. Yes, I know the odds are stacked against us, the age of the vw and the simple fact that it's a Vanagon. When's the last time you saw one on the highway that was rolling and not on the shoulder? Whatever...
The Plan:
Grand Rapids, Michigan to Chicago and all the way around,
Let's get moving, Next Stop, Lunch in Chicago!
Friday, April 5, 2013
Monday, August 27, 2012
Hot Slow Summer Progress
It's been a HOT summer but we have some progress to share.
UPDATE: Project Exhaust Manifold
Exhaust manifold bolts have been extracted from the heads the mating surface of the exhaust manifolds surfaced, one new push rod installed and the engine is back together and running.
UPDATE: RUST The Entry Step
All bad metal cut out, new metal welded back in and a new set of steps installed
UPDATE: Project Exhaust Manifold
Exhaust manifold bolts have been extracted from the heads the mating surface of the exhaust manifolds surfaced, one new push rod installed and the engine is back together and running.
UPDATE: RUST The Entry Step
All bad metal cut out, new metal welded back in and a new set of steps installed
Before
After
Support for the new steps
Next up is plywood and some flooring
Friday, June 22, 2012
Project - Broken Exhaust Mainfold Bolts
As you can see by my previous post, it only made since to check out that exhaust leak while we have the passenger floor out. Really, I'm not trying to create work for myself even though my wife states that " If you take any more parts off that thing you won't be able to say you own a RV," it's just the fact that the deeper I go into the project the more things I find that need fixed.
See my post "If It's Not Already New Or Broken It Will Be Soon!"
So here's a recap of my current situation: (NOTE: Days equal possible long stretches of time)
Day 1: Bring the Travco home, looks great! Replace fuel tank and go camping
Day 2: Replacing the tank was a pipe dream- see post below
Day 3: While I figure out what I'm going to do with the fuel tank, lets work on the electrical and refinish some cabinets.
Day 4: If we are going to refresh the cabinets, why not reupholster the seats and cushions? - Yes, I removed the interior.
Day 5: It's going to cost a bit to recover the interior so why not keep myself busy sanding the repaint off down to the original gel-coat and polishing
Day 6: Cabinets? Fabrics? Exterior? Well we can't go with that 30-year old floor now, can we?
Day 7: Let's remove some of that moldy carpet... Wow! and that rotten wood... and that rusted metal under it all...Hey, thats the ground were looking at!
Day 8: Which brings me to this post. "Project - Broken Exhaust Manifold Bolts"
Yes, three broken bolts, make that four so far, I broke another one and the drivers side manifold is not completely off yet. Have you ever taken a head off a Travco? It's an adventure for sure.
Process: (ALSO NOTE: there could be other steps involved such as taking an antifreeze shower etc. that are not listed here.)
Step 1: Remove air cleaner, intake manifold, water pump housing, which means remove front grill, radiator, condenser, trans cooler, air conditioning compressor and alternator
Step 2: Remove/break off exhaust manifolds, valve covers, valve train, bent push rod- Yes Bent?? and then heads. More on the push rod later.
Step 3: Inspect heads and remove broken bolts
Step 4: reassemble
See, it's no problem I tell my wife.
Wednesday, May 23, 2012
Interior Part One
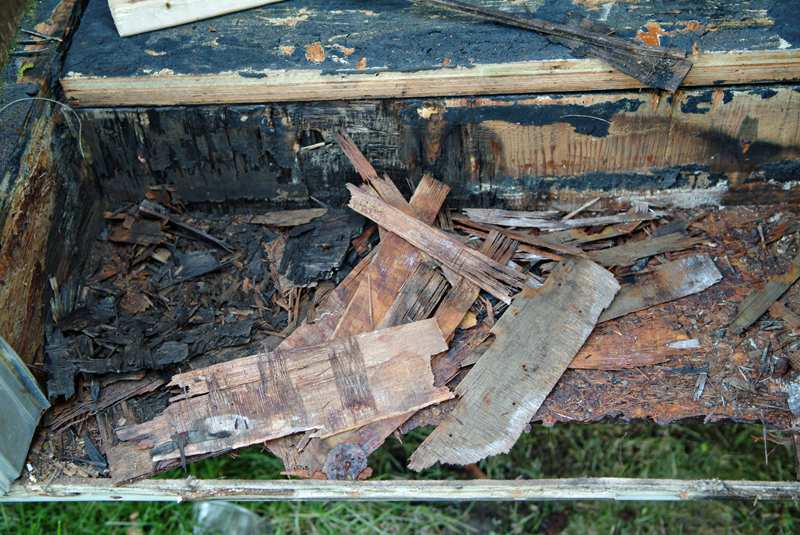
I am preparing a post dedicated to the rebuild and direction we want to go with the interior but we will save that for later as during our tear-out last weekend we found yet another area that needs attention. The passenger front floor showed signs of previous water stain on the carpet so we knew we had a possible issue and issue we have. The carpet was hiding a pretty significant problem as the plywood and metal under it were in bad shape. The metal itself was completely separated from the front and side walls due to rust.
On a good note, I think... we found during this destruction that the heater core water lines have been disconnected. I guess we will cover that also in another post.
Carpet removed
Plywood removed. It was nasty
This is what it looked like most of the way around.
Completely separated
Now might be a good time to take a look at the exhaust manifold
Monday, May 21, 2012
RUST. The Entry Step
If you own an old Travco, you know that the restoration job is never done. Yet I think that is the reason we choose these old RV's. It's about choosing the road less traveled, enjoying the world at a little slower pace and enjoying the simple things of life......
Yeah I'm trying to make myself feel better about my newfound RUST issue. From the looks of my entry step with the carpet removed, it looks like my new welder is going to get some more use. My goal for this project is to replace the rusted steel, replace the wood with new treated plywood and install new entry steps.
The fact that you can see the ground might be a problem
Ready for cutting the rusted metal out
Fuel Tank Part Two
We are starting to make a ton of progress. The fuel tank is not yet fully complete but I thought I would keep you up-to date on my progress. This project will be the first for my new/used Mig Welder.
Pretty basic tools for the job.
Fuel tank back from the sand Blaster
Problem: The rust was through the tank in two locations
The smaller of the two holes
Old cut-out section above and new patch to the left
Fitting the patch
First weld with the new welder. Looks like I need a little practice
Number Two
Fitting number two
The new welder. Also notice the panel clamps holding the tank together.
Bought them from Harbor Freight
All tacked together
Tuesday, May 1, 2012
The tools
A fun shot of the tools and sandpaper process lined up from 80 grit to 600 grit. I tried skipping a step or two but the results are not as nice and I had to go back and do those areas over.
Monday, April 16, 2012
Progress - To Paint or not to paint?
It was my goal to sand off the multiple layers of additional paint applied over the years and repaint the travco. While sanding, it was to my surprise that the gel-coat while not perfect was not downright terrible either. In my goal to get us camping this season I have decided to sand off all the cracked and peeling paint down to the gel coat and buff to a shine.
The Process: Orbital sand the whole body with 80 grit then 120 grit, 180 grit, 220 grit, and 320 grit. Then hand wet sand with 400 grit and 600 grit and follow up with machine rubbing and polishing compound. Finally a coat of wax.
The final result will be less than perfect but It will be very presentable for the season at a fraction of the cost and time of a new paint job
Cracked and peeling paint
Sanding off the old
In Process - Sanding off added paint
Looking better - Original Gel-coat
Monday, February 20, 2012
Where Did I Go Wrong?
Last we talked I was on the hunt for a welder to weld my fuel tank back together and hunt I did but somehow things got off on a different track.
Alright, I'm just going to put it out there.
I bought a sewing machine for my wife with my welder funds..... Yeah, let's just move on.
It's been a while since my last post but the quest has continued.
Currently:
1. Gas tank is still out and after hunting for a replacement all winter I have reverted back to my original plan of welding the tank back together. Let me know if you have a better idea.
2. The interior is extremely clean and in good condition but the thought of living with 30 year old foam rubber and fabric that has never been cleaned does not give me thoughts of relaxation. That said we pulled one of the covers off a rear bunk bed and carefully washed it in a kiddy pool, unfortunately it resulted in a semi-crispy fabric that I doubt will ever fit back on the foam. we knew this was the risk but until you try? With this new knowledge, we are now thinking we will use the other bunk cover to create a pattern and sew new covers. That sewing machine might come in handy after-all.
3. The cabinet and interior wood structurally is in good shape but the finish is pretty rough, it's cracking and peeling quite bad. I have sanded a couple doors down and tried a couple different stains but matching the original finish which looks like some form of one-step stain/varnish has proven difficult. Currently I am planning on either painting the cabinets, finding a contrasting stain or investigating the possibility of putting a laminate on the doors and painting the frames.
Alright, I'm just going to put it out there.
I bought a sewing machine for my wife with my welder funds..... Yeah, let's just move on.
It's been a while since my last post but the quest has continued.
Currently:
1. Gas tank is still out and after hunting for a replacement all winter I have reverted back to my original plan of welding the tank back together. Let me know if you have a better idea.
2. The interior is extremely clean and in good condition but the thought of living with 30 year old foam rubber and fabric that has never been cleaned does not give me thoughts of relaxation. That said we pulled one of the covers off a rear bunk bed and carefully washed it in a kiddy pool, unfortunately it resulted in a semi-crispy fabric that I doubt will ever fit back on the foam. we knew this was the risk but until you try? With this new knowledge, we are now thinking we will use the other bunk cover to create a pattern and sew new covers. That sewing machine might come in handy after-all.
3. The cabinet and interior wood structurally is in good shape but the finish is pretty rough, it's cracking and peeling quite bad. I have sanded a couple doors down and tried a couple different stains but matching the original finish which looks like some form of one-step stain/varnish has proven difficult. Currently I am planning on either painting the cabinets, finding a contrasting stain or investigating the possibility of putting a laminate on the doors and painting the frames.
I really like the dark wood of this Airstream pic.
Upper Cabinets
Lower Cabinets
Sanded Clean
New Stain - Take One
4. We are having a few electrical issues but I'll save that for another post.
Well the weather is getting warmer and the season just getting started.
Next Stop Lunch!
Subscribe to:
Posts (Atom)